The best time to visit EBC via Jiri
Like any other trek in Nepal, the best time to visit EBC, either with a flight to Lukla or trekking via Jiri, is in spring and autumn.
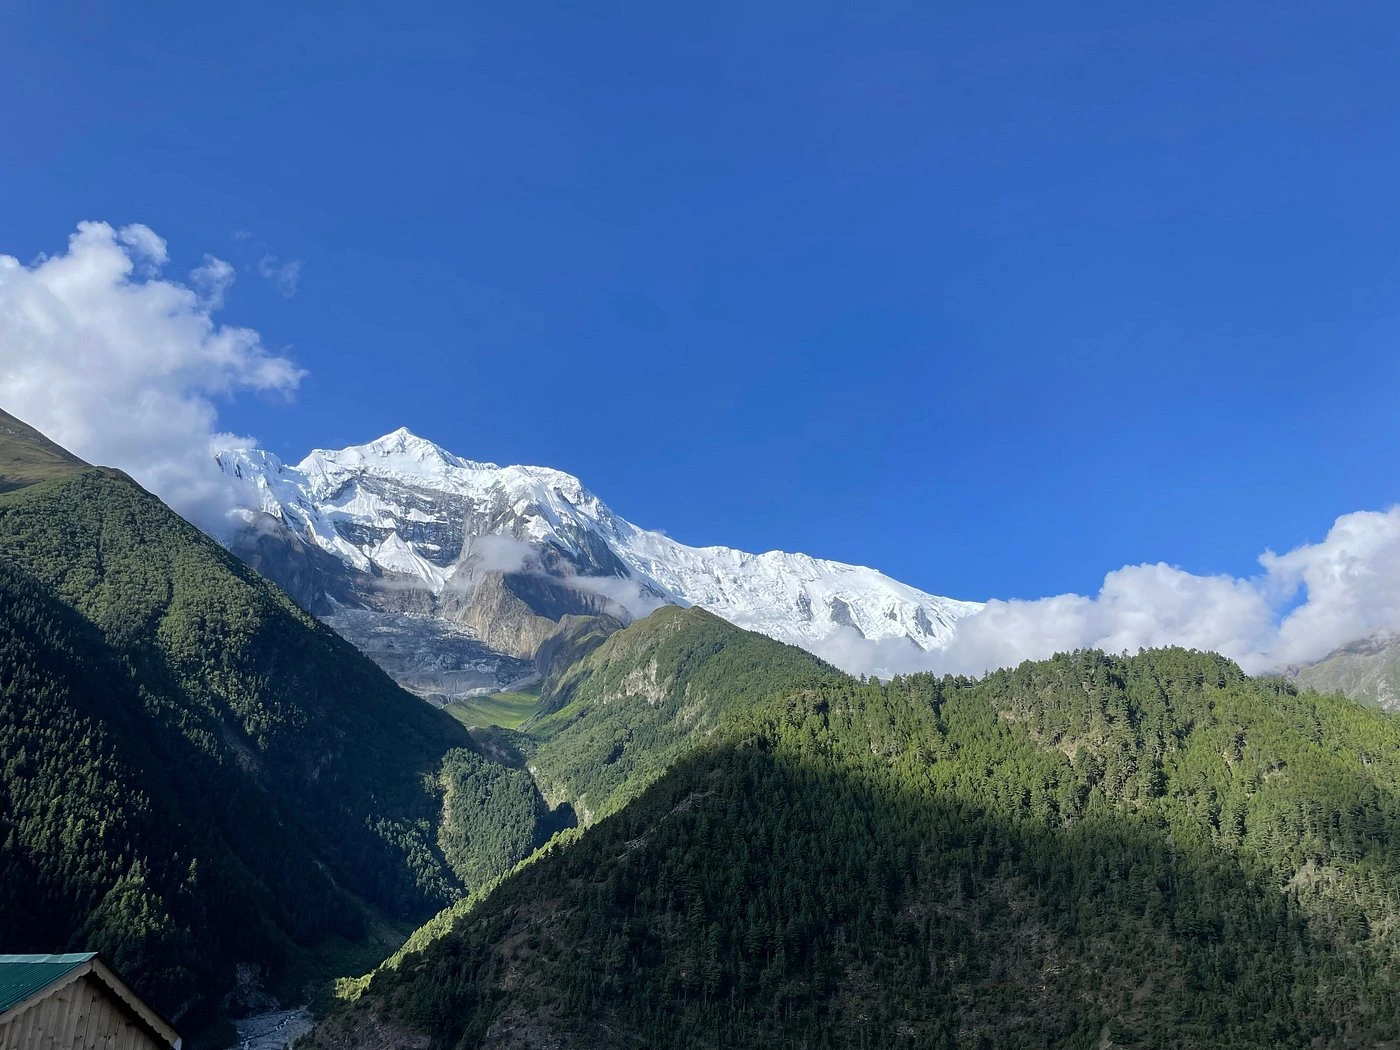
Everest region presents itself with stunning views of panoramic mountain peaks and its surroundings throughout the year. However, spring (Mach-May) and autumn (September-November) offer stable and favourable weather conditions for trekking.
Additionally, during these seasons, the skies are clear, offering spectacular views far and wide. Spring offers an excellent view of blooming rhododendrons. While autumn is a festive season, so trekkers can celebrate Dashain and Tihar with the locals.
In contrast, winter (December to February) and monsoon/summer (June to August) seasons could be challenging for trekking. However, for snow lovers, skiing and viewing sparkling, snow-covered mountains, winter could be the best time to visit Everest.
Despite monsoon rain, muddy trails, and risks of insect bites, monsoons are the best reason to witness vibrant rhododendron forests.
Difficulty for Everest Base Camp Trek from Jiri
The Everest Base Camp Trek from Jiri is considered a moderate to difficult trek. Trekkers must have good physical fitness and stamina to walk long distances and be mentally prepared.
This trek is more challenging than the standard Everest trek with the Lukla flight. Other difficulties are high altitude, rugged terrain, remote location, and unpredictable weather.
Longer Duration: The normal duration of an EBC trek is around 10-14 days. In contrast, the EBC trek with trekking from Jiri could be extended by a week. So, trekkers need to be prepared for additional days.
High Altitude: In this trek, trekkers will be reaching an elevation of 5550 meters at Kala Patthar. So, trekkers are prone to altitude sickness. Therefore, they need to ascend gradually and acclimatize to increasing elevation.
Rugged Landscape: The trail during the trek goes up and down, crossing rivers, forests, and suspension bridges. For that reason, trekkers should be extra careful and follow the standard trek route not to get injured.
Remote Location: Although the majority of the region has been populated, accessing modern facilities is still difficult in the Everest region. Proper, modern facilities are still lacking. Due to this, during emergencies and rescues, locals, as well as trekkers, need to rely on helicopter evacuations.
Unpredictable Weather: With the change in season, especially at higher altitudes, the weather changes drastically. Winter comes with chilling wind and snow, and monsoons face heavy rain, making trekking challenging.
Weather Information for the Trek
The weather on the Everest Base Camp trek via Jiri differs with the change in season and altitudes.
Spring and autumn are the best seasons, offering suitable climates and temperatures for trekking. During spring, temperature ranges between 10°C to 15°C during daytime and could drop below -10°C at night. Autumn also offers a similar kind of weather.
In contrast, winters are freezing, with temperatures often dropping below -20°C. So, if you are planning to trek Everest during winter, remember to pack accordingly.
Moreover, the monsoon could be a little warmer, with temperatures around 15-20°C. Monsoons receive heavy rainfall, making visibility poor and difficult to navigate.
Trekking Experience
Trekking to Everest Base Camp via Jiri is a challenging yet rewarding journey.
Generally, people who are looking to skip a flight to Tenzing-Hillary Airport, Lukla, opt to trek through a picturesque village, Jiri. This trek also offers a more immersive experience.
Trekkers pass through several traditional Sherpa settlements, where one can learn about their way of life and culture. Not only that, but trekkers can visit several monasteries, stupas, and a mountain museum in Namche.
Over cultural significance, scenic beauty, and exploring diverse wildlife are other exciting parts of this trek. Trekkers are rewarded with awe-inspiring views of towering peaks, lush forests, rivers, etc.
Overall, this trek is a complete package, providing an experience of mountain culture along with pristine scenery.
Roads on the trek and how to avoid
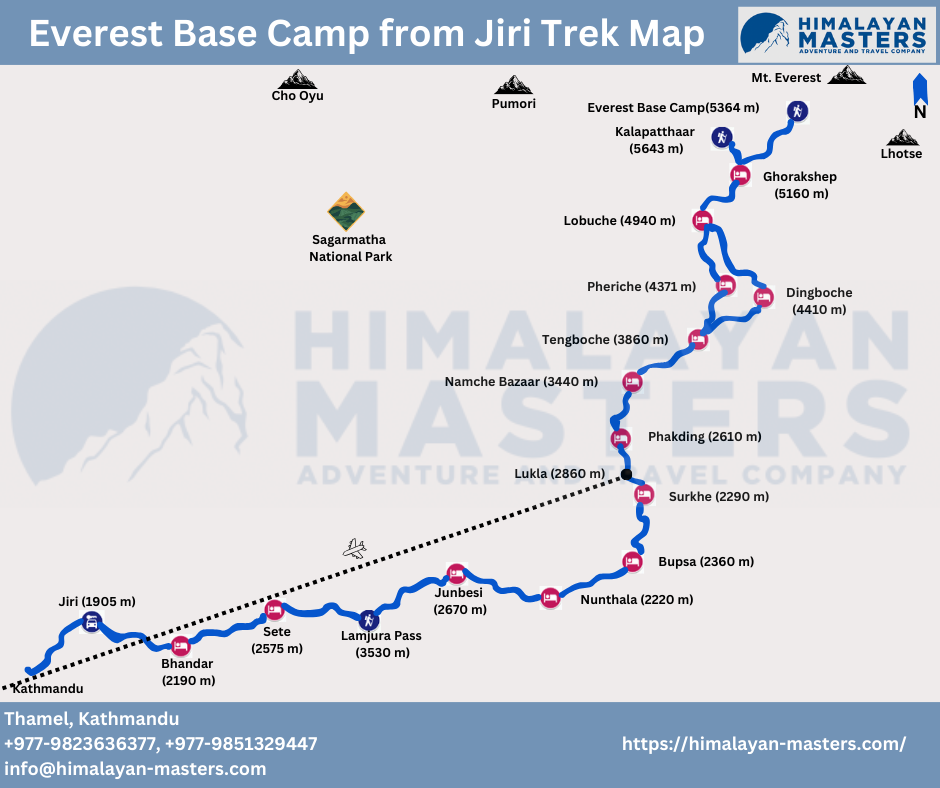
While trekking from Jiri, you’ll encounter motorable roads in most of the parts from Bhandara to Phakding. Thereafter, the route follows a traditional trek trail.
These roads can reduce the aesthetic beauty of the trek. At the same time, it offers a chance to soak yourself in the livelihood of local villages. Trekkers get to interact with the villagers and learn about their culture.
However, if you want to avoid these roads, you can choose to drive directly to Shivalaya to skip the busiest section of the road. Also, hiring a local guide could be another option. They are well known for their routes. So that they can lead you through the routes where it is still intact, apart from modern roadways.
Trip Grade: Fitness Level, Medical, and Health
This trek is graded as a strenuous and demanding trek.
Trekkers need to be well prepared to walk for 6-8 hours daily on a secluded terrain. The route passes through rugged terrains, along the river, and through dense forest.
Therefore, trekkers are required to be physically fit. They also need to be prepared for the potential risk of altitude sickness. Acclimatizing properly, hydration, proper sleep, and eating nutritional foods are essential to avoid altitude sickness.
It is advised that trekker consults with their physician before going on a trek. Especially people with asthma, pregnant women, or people with pre-existing health conditions should be extra careful.
We suggest doing some leg and cardiovascular exercises like running, swimming, cycling, yoga, and meditation one month prior to the trek. Going on short hikes is quite helpful.
Preparation for Everest Base Camp Trek via Jiri
Having prior trekking experience or any special trekking is not essential. But having trekked or hiked before is beneficial.
Since this is a high-altitude trek, there are several risks related to a high, mountainous trek. For that reason, trekkers are required to be physically and mentally sound and prepared.
Preparing for the trek not only includes training but also acquiring information about the region, route, and culture is equally important. Further, choosing proper trekking gear for the EBC trek via Jiri could be crucial.
Likewise, having travel insurance and hiring an experienced guide and porter also play a vital role in the success of the trek.
Altitude Sickness During the Trek
The risk of altitude sickness during EBC Trek is the most common danger associated with trekking in high altitudes.
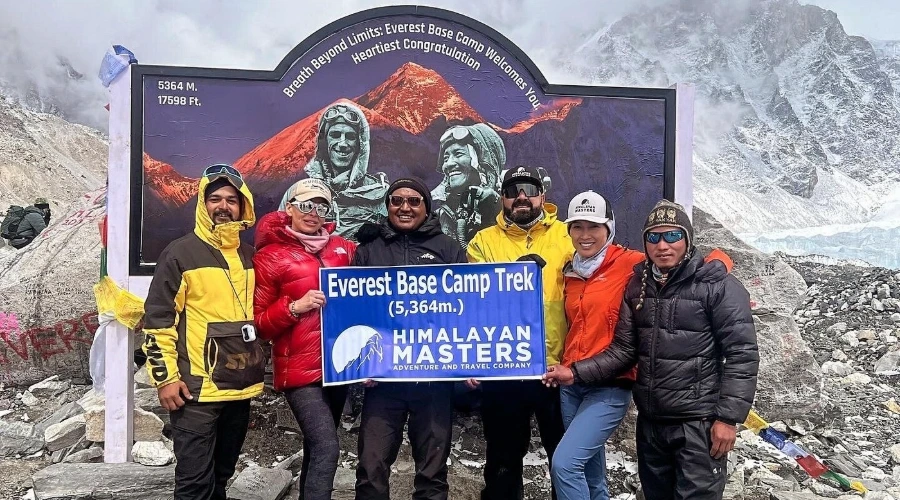
Trekkers will be trekking up to an elevation of 5364 meters (17,598 ft) at the Base Camp of Everest and 5550 meters at Kala Patthar.
If you choose to extend your trek further to cross Three Passes Everest Trek, you will be trekking above 5000 meters several times.
Trekkers can show symptoms of altitude sickness like difficulty breathing, loss of appetite, loss of sleep, vomiting, headache, etc. This is why our itinerary included 2 days of acclimatization day, one in Namche and another in Dingboche.
This allows trekkers to acclimatize to sudden changes in elevation. Despite this, if you suffer from altitude sickness, it is essential that you inform your guide about these issues and take precautionary measures.
Trekkers need to descend to lower elevations, stay hydrated, eat digestible food, or use medication to tackle these issues. In the worst-case scenario, helicopter evacuation might be required.
Emergency and Evacuation
Emergencies such as altitude sickness, injuries, or other health issues are possible on Jiri to Everest Base Camp Trek. In that case, sudden helicopter evacuation could be the best possible or the most efficient and effective way to tackle these emergencies.
Therefore, it is important to trek with an experienced travel agency and guide. They can help you with first-aid treatment or arrange helicopter evacuation immediately.
Be assured that your safety is our first priority. So, if you are trekking with us, with Himalayan Masters, we will arrange all the trek essentials, including helicopter evacuation, ASAP, if needed.
Insurance
Especially when trekking in high altitudes, it is better to have travel insurance that covers emergency evacuations. It is recommended that your travel insurance policy should cover helicopter rescues, medical bills, and trip cancellations.
You must bring a printed copy of your insurance policy on the trek and submit it to the agency you are trekking with, along with your emergency contact details.
Trek Cost
The overall cost of the trek depends on the season you are travelling, the services you include, the duration of the trek, and a few other additional expenses. Depending on all the factors, trekking from Jiri to Everest Base Camp can cost around USD 1300 to USD 2500.
If you are trekking with Himalayan Masters, you can complete the trek for just USD 1670. This trip package includes all the expenses like food, accommodation, permits, a guide, and transportation.
Here’s a breakdown of the cost of the EBC trek.
Accommodation and Food: For 3 meals a day and a night, accommodation in a teahouse could cost around $30-$40 per day.
Transportation: If you are travelling by public bus from Kathmandu to Jiri, it costs around $10-$1 and about $200 for a private vehicle.
Permits: Trekkers need to have 3 permits for the EBC trek from Jiri, which all together comes around $60-$70.
Guide and Porter: Usually, the cost of hiring a guide is around $25 per day, and for the porter, it is around $20 per day.
Additional Expenses
Apart from the standard cost of the trek, trekkers can expect to spend around $15-$20 per day.
- For snacks, in between the way, trekkers could expect to spend around $5-$10 per day.
- Additional services, like Wi-Fi, hot showers, hot water, battery charging, etc., in the teahouses might cost around $10 per day.
- It’s customary to tip guides and porters for their hard work. How much you tip is your wish; usually, it’s $10-$15 per person per day.
- If you don’t have proper gear for the trek, the cost of buying them can also be included in additional expenses.
Required Permits for Trek to Everest from Jiri
For trekking around the Everest region via Jiri, trekkers must obtain 3 permits.
Sagarmatha National Park Entry Permit
As you will be trekking inside the territory of Sagarmatha National Park, you will need to issue an entry permit. It can be issued at the Lukla checkpoint or from the Nepal Tourism Board, Kathmandu.
Khumbu Pasang Lhamu Rural Municipality Permit
This is a local area permit levied with the sole purpose of collecting funds for the improvement of local villages and the livelihood of inhabitants. This permit can be issued at the Khumbu Pasang Lhamu Rural Municipality Office in Lukla.
Gaurishankar Conservation Area Permit
This permit is especially required if you are trekking from Jiri. If you fly directly to Lukla, this permit is not required. This permit can be issued in Kathmandu or at the gate of the Gaurishankar Conservation Area.
We will arrange all these permits so that you can rest assured and trek without worrying about anything.
Packing List for the trek
For a safe and successful trip, packing appropriate gear for the trek is crucial. Overpacking or underpacking could result in additional difficulty during the trek.
Also, this trek is a high-altitude trek, so packing warm clothes and other essentials is important. However, the packing list could vary according to personal needs.
Some of the essential packing lists for the Everest trek are given below.
Clothes: Thermal base layer, fleece jackets, trekking pants, waterproof jackets, gloves, warm socks, neck gaiters, cap, etc.
Trekking gears: Trekking poles, sturdy and waterproof hiking boots, a daypack, a sleeping bag, etc.
Accessories: Sunglasses, headlamp, reusable water bottle, water purification tablet, camera, extra battery, power bank with good backup, first-aid kit, etc.
Miscellaneous: Snacks, energy bars, a trek map, sunscreen, lip balm, etc.
Accommodation and Food During the EBC Trek from Jiri
It is basically a teahouse trek. Therefore, the accommodation and food during the EBC trek from Jiri are done in simple yet satisfactory enough teahouses.
Accommodation
Trekkers can stay in a good quality teahouse or lodge in Phakding, Namche and a few other places. However, as you trek to higher altitudes, the teahouses are just basic.
While trekking from Jiri until trekkers reach Phakding, accommodation is even more basic. They provide shared rooms with minimal facilities, a bed and a blanket. Even though the accommodation in the teahouses is warm enough, we advise that you carry a sleeping bag to stay warm.
Nevertheless, accommodation on the standard EBC trek route is better, if not best. Some of the teahouses even have attached bathroom and in-room charging plugs.
Normally, teahouses offer neat and warm beds to sleep in, hot water, gas showers, Wi-Fi, and battery charging at an additional charge. Additionally, they provide delicious, nourishing meals in a cozy, centrally heated dining hall.
Food
Trekkers can savour a range of foods on this trek.
In the first section of the trek, from Bhandara to Phakding, the food is basic. Trekkers can eat Dal Bhat (rice with lentil soup), noodles, pasta, soup, fried rice, Mo: Mo, etc.
While in the Phakding, Namche, and Lukla, trekkers can have a wide variety of Nepalese and Western cuisines on the menu. Moreover, in higher regions of Everest, the food menu is basic.
Nevertheless, the foods served in the teahouses are good enough to give you adequate energy to trek for the day. Also, it is advised not to eat meat as you trek towards higher altitudes. There are no proper refrigerators to store meat, due to which meats could have been spoilt.
Let’s break down food options for breakfast, lunch, dinner, and local foods.
Breakfast Menu
- Porridge with honey
- Tibetan bread with jam or butter
- Roti and chapati
- Egg dishes
- Pancakes
- Tea/Coffee, etc.
Lunch Menu
- Dal Bhat
- Veg and non-veg curry
- Noodle soup
- Fried rice
- Mo: Mo
- Chowmin
- Pasta, etc.
Dinner Menu
- Dal Bhat
- Veg and non-veg curries
- Thukpa
- Potato items
- Pasta
- Local style pizza
- Pudding
- Chocolate rolls
- Soup, etc.
Local Food Menu
- Gundruk
- Dhindo
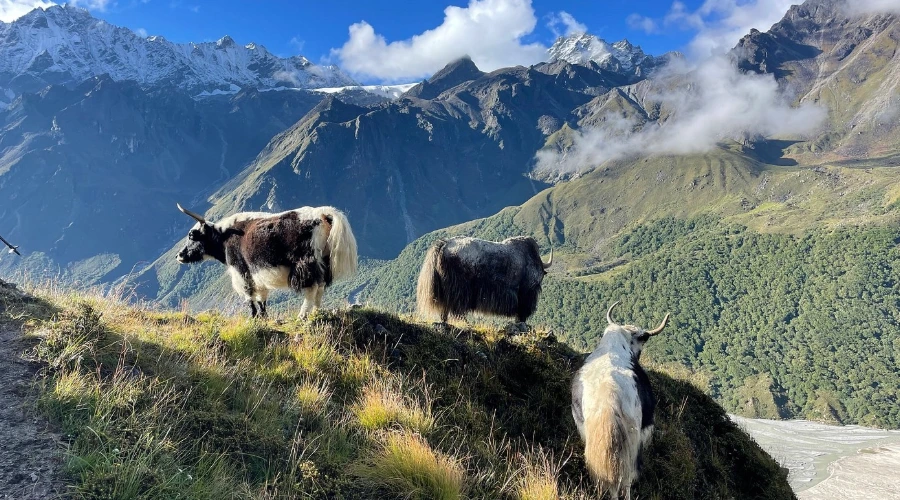
- Yak butter
- Sherpa Stew (a mixed stew made of potatoes, vegetables, and noodles, sometimes with meat)
ATM on the Trekking EBC from Jiri
The last place ATMs are available is in Namche. However, it cannot always be relied upon. So, it would be wise to exchange your money in Nepalese cash here in Kathmandu before beginning your trek.
Also, every time you pay by ATM, you need to pay an additional 3.5% additional charge, which is not wise to do always. Carrying some Nepalese cash to pay for the additional services and snacks on the route is recommended.
Money Exchange
Although there is a money exchange service available in Namche, we advise that you get your money exchanged into Nepali Rupees in Kathmandu. Also, the money exchange rates can be unfavourable while on the trek.
You can exchange foreign currencies with Nepali rupees in any money exchange booth in Kathmandu or around Thamel.
To exchange money, you will need to submit a valid passport, proof of a valid visa for Nepal, and a currency declaration form.
Electricity and Battery Recharge
Electricity is available throughout the route. However, power outages are common, especially in remote regions.
Until Namche electricity becomes available from the power grid, But, as you trek to higher regions, electricity is generated through solar panels. Due to this, trekkers will need to pay additional charges (around $2-$5 per hour) for battery charging, hot water, and so on.
Therefore, it is advised to carry a power bank with a good backup or solar charger and extra batteries for electrical appliances.
Tips for Safe Drinking Water
Safe drinking water is essential for a safe and successful trekking experience.
Bottled water is available in the teahouses, but the price increases as it moves towards higher altitudes. A bottle of water can cost around $1-$4.
So, it is better, more economical, and more environmentally friendly to carry a reusable water bottle and fill it from the taps in teahouses or on the way. Moreover, it is vital that you purify the water with a purification tablet at least 20 minutes before drinking it.
Remember to consult your guide if the water is drinkable or not before drinking it, and stay hydrated.
Facilities of Communication
Trekkers can get mobile network coverage almost throughout the trekking route. NCELL and NTC SIM cards provide network coverage on the route. However, as the signal weakens at higher altitudes. These Nepalese SIM cards can be bought in any shop selling them in Kathmandu.
Likewise, teahouses also offer Wi-Fi service for an extra $2 or $3 per hour, although the speed and reliability can vary.
‘Everest Link’ internet is available, particularly operable in the Everest region. It is a wireless internet service (prepaid cards) that can be bought en route to Everest.
Pros and Cons Between Guide vs Solo Trekking
Trekking with or without a guide has its pros and cons.
Whenever trekking in the Everest region, hiring a guide is a bonus. They have insight into the route, weather, and local culture and prove to be helpful in case of emergencies. Hiring an experienced, professional guide boosts the chances of a successful trekking experience.
In contrast, if you are a solo trekker, it offers freedom and flexibility. Trekkers can trek at their own pace in a peaceful setup. However, if you are solo trekking, it is essential to gain some basic knowledge of the region.
Solo trekkers need to know about all the routes, food and accommodation, transportation, permits, and weather information and be aware of local culture. It also reduces the overall cost of the trek, but know that solo trekking is going to be more challenging and exciting at the same time.
Porter vs no Porter | Which is Best?
Hiring a porter or carrying your own load is up to you. If you do not have much weight to carry or are habitual to trekking with some luggage, trekking without a porter will save you some dollars.
However, trekking for several days, a daily walk of 5-7 hours, is not an easy task. It puts pressure on your shoulder, legs, back, and overall body. So, hiring a porter allows you to walk freely and enjoy the scenery.
Also, by hiring a porter, you’re not just helping yourself, but you are helping the porter, his family, and the whole tourism community.
Alternative Trekking Routes Options
There are several trek options that you can do alternatively in the Everest region.
Lukla to EBC Trek: This is the most common trek option, leading you to the base of the world’s 8th highest mountain, Mount Everest (8848.86 m). Typically, this trek can be completed in 10-14 days.
Gokyo Lakes Trek: EBC and Gokyo Lakes Trek are scenic alternative treks that you can do in the Khumbu region. This trek leads you to the Everest Base Camp, where you can witness beautiful Gokyo Lakes via Cho La Pass (5420 m/17,782 ft).
Three Passes Trek: Everest Three Passes Trek is a little longer, more challenging, adventurous, and exciting trek. During this trek, trekkers must pass 3 different high-altitude passes – Kongma La Pass (5535 m/18,159.5 ft), Cho La Pass, and Renjo La Pass (5360 m/17,585 ft).
Phaplu to Everest Base Camp: This is a shorter version of the Jiri to EBC trek. The trek traverses around Jiri and leads up to Phakding in around 4-5 days, from where the traditional Everest Base Camp Trek continues.
You Can Extend your Trip
The Everest Base Camp Trek from Jiri itinerary can be extended by a few days. You can add additional days to explore nearby places and immerse yourself in the beauty of the Everest region.
Adding a few days to explore Namche Bazaar or extending the trek to explore Gokyo Ri with three passes is a great option.
Besides exploring mountains, exploring Kathmandu Valley or going on a Nepal tour could be options.
In Kathmandu, you can just stroll around the local markets of Kathmandu or around Thamel, doing shopping. Or, visit several popular sites like Pashupatinath, Durbar Squares, Swoyambhunath, etc., which are also listed as UNESCO World Sites.
We can also arrange a Nepal Tour, in which you can visit places like Pokhara, Lumbini, and Chitwan.
Extending Trip to National Parks
One of the best things to do after completing a long and strenuous trek is to extend a trip to visit a national park.
Extending trips to Chitwan National Park is one option that trekkers choose. The national park offers a diverse range of wildlife exploration, including one-horned rhino, elephant, gharial crocodile, and several species of birds.
Further, another choice is Bardiya National Park. Unlike Chitwan National Park, Bardiya National Park offers wilderness along with rich flora and fauna. It is one of the best places to witness the Bengal tiger in its natural habitat.
How to Book Everest Base Camp Trek from Jiri
Booking the Everest Base Camp Trek from Jiri is very easy. For that, you can contact us through any Social Media, such as email, WhatsApp, phone calls, or by filling out an online form from our website.
Then, we will email you all the details of the trek, including itinerary and miscellaneous services. If you have any customizations or requests, you can do so. We will try our best to make it up to you.
Once everything is discussed and you decide when and which trek you want to go for, you will need to pay $200 to confirm the booking. Once we receive the payment, your booking process will be complete.
Now, you can visit Nepal anytime; as per your booking, we will be having a short briefing session in our Thamel office, or it can be done online, too. Finally, after paying the full amount, the only thing remaining is to set out on a trekking journey.
Note: You can postpone the trek as many times as you wish, but the money you pay to book the trek is non-refundable. So, it is vital to go through all the privacy policies before booking the trek.
Why Choose Himalayan Masters
Himalayan Masters is a team of highly experienced and professional personnel. We are dedicated to ensuring a safe, comfortable, successful, and memorable trek experience.
Be assured that you will be receiving the best services we have to offer. The itinerary we provide is designed in such a way that it is easily achievable. Over that, we offer one of the most comfortable and affordable trip packages.
We just don’t make clients; we make friends.
We Appreciate Your Review
Now that you have completed the most memorable trek, do not forget to leave feedback and review. You can give feedback regarding both our strong and weak points, which will help us grow.
Your feedback is much appreciated.