




Nepal Trek Challenge: What Beginners Should Know
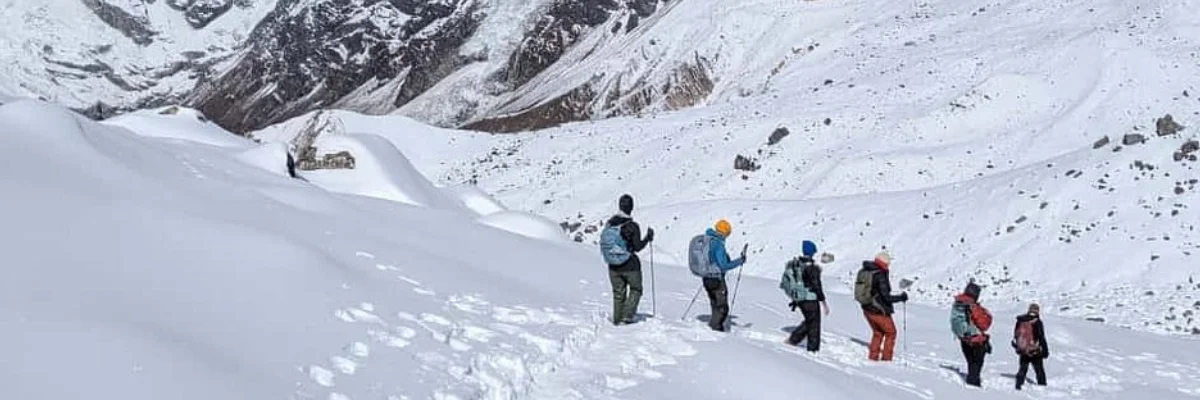
Treks are always fun when done by measuring the difficulty and preparing accordingly, but treks in Nepal offer a different experience. The Nepal trek challenge is a topic you must know and explore before embarking on the actual trek.
We underestimate the difficulty of treks, but when you do so, you might put your life at risk. The Nepal trek challenge means understanding the challenges of trekking in Nepal.
This guide is for both beginner trekkers and seasoned mountaineers to make them aware of trek challenges. With the right preparation, even first-time trekkers can trek in Nepal because it’s all just a matter of mindset.
Nepal is called the trekker’s paradise for a reason. You find all types of treks ranging from moderate difficulty treks like Ghorepani Poon Hill, the Iconic Everest Base Camp trek, to the hardest Three Pass Trek.
Let’s dive deeper into this topic.
Things to Know Before Accepting the Challenge
In Nepal, you find all types of treks, ranging from moderate to the hardest. There are things you must know before accepting the challenges.
Not all the treks match your fitness level, preparation, and expectations. While choosing to trek, make sure you pay attention to the following things.
Trek Difficulty Levels in Nepal
Trekking in Nepal comes with different levels of difficulty, so there’s something for everyone from first-time hikers to seasoned mountaineers.
Beginner treks usually stay at lower altitudes with well-marked trails and last about 3 to 7 days, making them perfect for those with normal fitness.
Intermediate treks go higher into the mountains and can take 7 to 14 days, requiring good stamina to handle the elevation and longer walks.
Advanced treks involve crossing high passes and exploring remote trails, often lasting more than 12 days and demanding high endurance.

For the most challenging adventures, Summit or Peak Climbs take 14 to 20 days and need technical climbing skills, glacier travel experience, and strong physical training.
Nepal’s wide range of trekking routes means you can always find one that matches your fitness level and adventure spirit.
How Altitude Changes Everything
As you go higher, air pressure drops, which reduces oxygen in the air, making breathing difficult and walking tiring. This affects how well your body performs, your sleep, and your appetite.
Also, with quick ascent comes altitude sickness with symptoms like headaches, nausea, and fatigue. Trekkers should take it easy and give themselves time to acclimatize by climbing slowly, drinking plenty of water, and taking a rest when they need it.
At higher altitudes, the temperature drops quickly, and the weather becomes more unpredictable, which is why it is so important to be properly equipped.
To have a safe and enjoyable trekking experience in the Himalayas, it is very important to understand how altitude affects your body.
Weather and Best Trekking Season
Nepal’s weather is very changeable, especially in the mountains. For the best trekking experience, go from March to May and September to November when the weather is at its best, the temperatures are moderate, and the views are outstanding.
In winter, from December to February, expect snow and very cold temperatures in the high-altitude areas. In summer, from June to August, you’ll see heavy rain and very slippery routes.
You should choose your season carefully, which will help you avoid weather-related issues like landslides, closed passes, or poor visibility.
Also, check the forecast before you set out and pack layers to adapt to changing mountain conditions throughout the day.
Trekking Permits Overview
Nepal has most of its trekking areas that are special permit areas, controlled by the local authorities, or conservation areas.
Standard ones are the TIMS card (Trekkers Information Management System) and area-specific, such as the Annapurna conservation area permit or the Sagarmatha national park permit.
Specific areas such as Upper Mustang or Manaslu require restricted permits, and, in most treks, registered guides are mandatory. The fees contribute to local conservation and safety.
In every situation, it is important to secure the permits before the trek to avoid inconveniences. Make copies and carry them as a backup at checkpoints on the way.
Guided Trek Vs Independent Trek
Deciding whether to go for the guided trek or the independent trek depends on the experience and level of comfort.
Guided trek refers to hiking with guides and porters who do all the work, including navigation, permits, and logistical arrangements; hence, the expedition is easier and more structured.
It is best to use it in remote areas or by beginners. Independent trekking has a greater level of freedom and flexibility, though it demands good preparation, understanding of maps, and self-control skills.
It is cheaper to save a bit, but it is also an increased responsibility. Guided treks tend to be the best and the safest for first-timers.
Trail
Nepal’s trails vary from easy village paths to steep rocky climbs. Some are well-marked and busy, while others are remote and rough.
Knowing the trail type helps you prepare your gear and pace yourself better. Always follow marked paths, greet locals respectfully, and enjoy the changing scenery and culture along the way.
Daily Ascent and Descent Rhythm
Trekkers usually walk 5–7 hours daily, climbing slowly and taking breaks. Follow the rule “climb high, sleep low” to adjust to altitude. Avoid rushing uphill, as it causes fatigue and altitude problems.
Descend carefully using trekking poles and drink enough water. A steady rhythm keeps you strong and helps you enjoy each day’s journey.
The Nepal Trek Challenge Levels
There are different levels to trekking experiences in Nepal, which range from beginner to summit climbs. Let’s explore more about the trek challenge levels.
| Level | Description | Ideal Duration | Fitness Needed |
| Beginner | Low altitude, marked trails | 3 to 7 days | Normal fitness |
| Intermediate | Higher altitude, more elevation | 7 to 14 days | Good stamina |
| Advanced | High passes, remote trails | 12+ days | High endurance |
| Summit/Peak Climbs | Climbing gear and walking through glaciers, crevasses and rocky mountains | 14+ days | Strong fitness + training |
Beginner Nepal Trek Challenges
Annapurna Base Camp trek, Langtang Valley trek, Mardi Himal trek, Ghorepani Poon Hill trek, and Pikey Peak. All these treks are beginner-friendly, lasting just a week.

It does include moderate elevation ranging from 2700 meters to 4500 meters. All these treks are doable with moderate fitness; just make sure you train yourself a few weeks prior to your trek.
Intermediate Nepal Trek Challenges
The intermediate treks in Nepal do require good stamina because they include trekking for days on rugged terrains at high altitude. Such treks last for more than a week or two.
Everest Base Camp trek, Manaslu Circuit trek, Annapurna Circuit trek, Tilicho Lake trek, Khopra Danda trek, Nar Phu Valley trek, Upper Mustang trek, and Langtang Gosaikunda trek.
These treks can be done by those who love to explore remote valleys, adventure, and high-altitude trekking.
Advanced Nepal Trek Challenges
Kanchenjunga Base Camp trek, Rara Lake trek, Upper Dolpo trek, Manaslu Tsum Valley trek, and Three Pass Trek. These are the advanced treks, which include crossing high passes and remote trails.
To complete these treks, you have to have high endurance, proper training, and preparation.
Nepal Peak Climbing Challenge
Yala Peak Climbing, Mera Peak Climbing, and Island Peak Climbing are moderate peak climbing adventures that require strong fitness and prior training. These moderate treks are hard and technical and require guidance and teamwork.

For extreme expeditions like Everest Climbing and Annapurna Climbing, you need special months of training and preparation. These climbs require multiple permits and are very expensive.
How to Train for the Nepal Trek Challenge?
Trekking in Nepal involves walking 5 to 7 hours a day on uneven terrain, often at high altitudes where oxygen is thin. Proper training prepares your body to handle physical strain, prevents altitude fatigue, and makes your experience more enjoyable and safer.
When taking intermediate and advanced treks, make sure you train for 6 to 12 weeks. Here’s the detailed training plan you can include in your training.
Build the Base on Week 1-2:
- Brisk walk or jog: 30-45 mins, 4-5 times a week
- Light strength: squats, lunges, planks (2–3 times/week)
- Short hike or stairs: 20-30 mins once a week
Add Strength and Hills Week 3-4:
- Cardio: 45-60 mins with some uphill walking
- Strength: legs and core (step-ups, squats, push-ups)
- Stairs or hill climb: twice a week with a 3–5 kg backpack
- Long walk or hike: 2 hours once a week
Trek Simulation Week 5-8:
- Long hikes: 3-5 hours, 1-2 times per week with 5-8 kg backpack
- Strength: squats, lunges, planks (2 times/week)
- Hill sprints or interval training: once a week
- Moderate cardio: 45 mins, 3-4 times/week
Build Endurance & Recover Week 9-12:
- Long trek-style walks: 3-6 hours, 2-3 times per week.
- Light strength + stretching: 2 times/week
- One full-day hike every weekend
- Reduce intensity in the final week before travel.
- Remember that the training is different for 8000 meters above sea level.
Packing and Gear Checklist: Your Backpack Is Your Best Friend
Your backpack becomes your constant companion on the trek, carrying everything you need while keeping your load comfortable and balanced.
The right size (usually 40–50 liters for a porter-assisted trek and 60–70 liters for self-carry) ensures you have space for essentials without overpacking. Make sure it has padded shoulder straps, a hip belt, and a rain cover
1. Trekking Boots
Good boots are your foundation. Pick waterproof, ankle-supporting trekking boots with a solid grip. Break them in before your trip to avoid blisters. Carry light sandals for evenings.
2. Layer System
Mountain weather changes quickly, so wear layers you can adjust:
Base layer: Quick-dry or merino wool tops and leggings to keep sweating away.
Mid-layer: Fleece or down jacket for warmth.
Outer layer: Waterproof and windproof jacket and pants.
Also pack warm hats, buffs, gloves, and spare socks.
3. Sleeping Bag
Bring a sleeping bag rated to -10°C to -15°C for cold nights. Down bags are lighter and warmer, while synthetic ones are better in damp conditions. A liner adds extra warmth and cleanliness.
4. Essentials
- Hydration tablets or salts to avoid dehydration
- Trekking poles for knee and balance support
- 2-3L water bottle or bladder
- Headlamp with batteries
- Sunscreen, lip balm, sunglasses
- First-aid kit and any medicines
- Power bank and travel adaptor
- Small towel and toiletries
5. Ultra-Light Packing Tips
Pack only what you will use and choose quick-dry, multi-purpose clothes. Roll clothes instead of folding and use packing cubes for organization. Keep your daypack under 6–8 kg if you have a porter. Carry some snacks like energy bars or nuts for quick energy.
Note: The packing list, training and preparation differs when you climb 8000 meters above peaks.
Loading...
related post


Author

Bryan BK is a storyteller at heart and an adventurer by soul. As a passionate writer and traveler, he finds inspiration in the places he visits and the people he meets. Through his words, he brings destinations to life, sharing experiences that inspire others to explore, dream, and discover.


Leave Your Comment